1.Update dan install Exim menggunakan command dibawah ini
- apt -y update && apt -y upgrade
- apt -y install exim4-daemon-heavy
- dpkg-reconfigure exim4-config
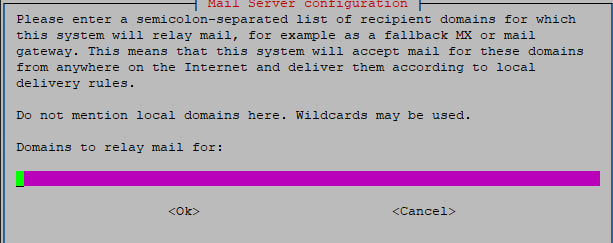
2. Lalu setup instalasi Exim sesuai capture dibawah ini




3.Konfigurasi route dan SMTP Exim
- domainlist local_domains = MAIN_LOCAL_DOMAINS : lsearch;/etc/listofdomains
File /etc/listofdomains nantinya digunakan untuk men-whitelist domain mana saja yang bisa mengirim melalui exim
Selanjutnya masuk ke bagian virtual router,silakan untuk menambahkan konfigurasi sesuai capture berikut:
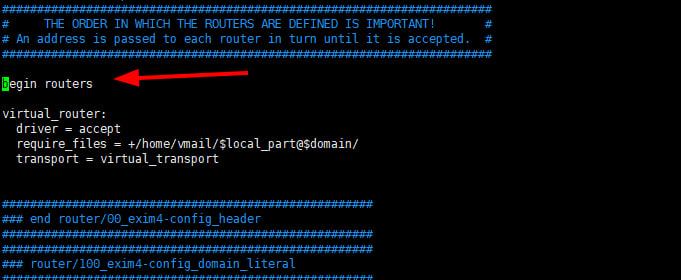
#####################################################
### virtual router configuration
#####################################################

virtual_router:
  driver = accept
  require_files = +/home/vmail/$local_part@$domain/
  transport = virtual_transport

#####################################################
### end virtual router configuration
#####################################################
Selanjutnya masuk ke konfigurasi transport exim,silakan untuk menambahkan konfigurasi sesuai capture berikut.
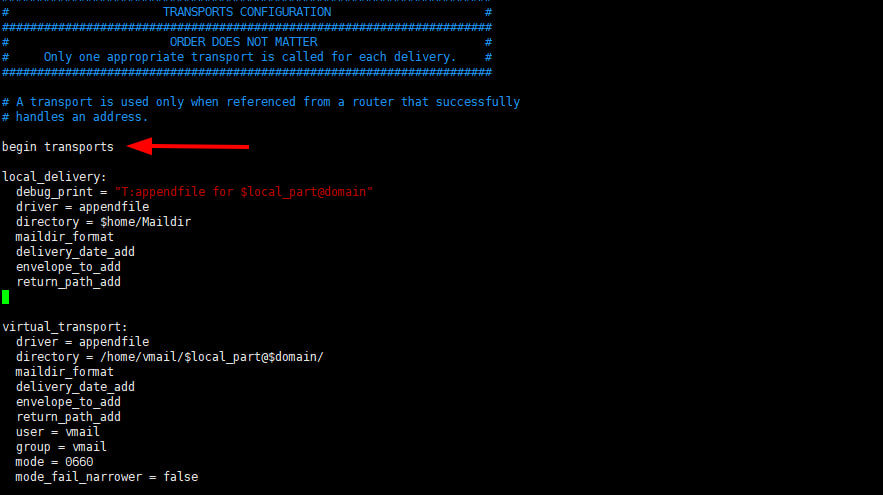
#####################################################
### transport that handles delivery to local users
#####################################################

local_delivery:
  debug_print = "T:appendfile for $local_part@domain"
  driver = appendfile
  directory = $home/Maildir
  maildir_format
  delivery_date_add
  envelope_to_add
  return_path_add

virtual_transport:
  driver = appendfile
  directory = /home/vmail/$local_part@$domain/
  maildir_format
  delivery_date_add
  envelope_to_add
  return_path_add
  user = vmail
  group = vmail
  mode = 0660
  mode_fail_narrower = false
Selanjutnya,masuk ke bagian authentikasi dan pada kali ini saya akan menggunakan authentikasi dovecot.

#Dovecot Authenticator

dovecot_login:
  driver = dovecot
  public_name = LOGIN
  server_socket = /var/run/dovecot/auth-client
  server_set_id = $auth1

dovecot_plain:
  driver = dovecot
  public_name = PLAIN
  server_socket = /var/run/dovecot/auth-client
  server_set_id = $auth1
Lalu selanjutnya,kita perlu menambahkan smtp helo dan auth untuk outgoing menggunakan 465


4. Menambahkan domain yang diizinkan mengirim email via exim,Anda bisa menambahkan root domain,FQDN (Hostname Mail Server), dan Domain lain
vim/etc/listofdomains
server.example.com
example.com
voorbeeld.nl
5. Instalasi dan Konfigurasi Dovecot
apt -y install dovecot-core dovecot-imapd dovecot-pop3d
Selanjutnya, silakan men-setting konfigurasi untuk maildir user di dovecot
/etc/dovecot/conf.d/10-mail.conf
mail_location = maildir:/home/vmail/%u
Selanjutnya,kita perlu men-define authentikasi dan ownership dovecot
vim /etc/dovecot/conf.d/10-master.conf
service auth {
   unix_listener auth-client {
      mode = 0660
      user = Debian-exim
   }
}
Selanjutnya,kita perlu men-define authentikasi yang akan digunakan untuk login ke user
vim /etc/dovecot/conf.d/10-auth.conf
auth_mechanisms = plain login
Selanjutnya,konfigurasi untuk menyimpan password user nantinya (passdb)
/etc/dovecot/conf.d/auth-system.conf.ext
#passdb {
#  driver = pam
  # [session=yes] [setcred=yes] [failure_show_msg=yes] [max_requests=<n>]
  # [cache_key=<key>] [<service name>]
  #args = dovecot
#}

passdb {
  driver = passwd-file
  args = /etc/dovecot/imap.passwd
}

#userdb {
  # <doc/wiki/AuthDatabase.Passwd.txt>
#  driver = passwd
  # [blocking=no]
  #args =
#
  # Override fields from passwd
  #override_fields = home=/home/virtual/%u
#}

userdb {
  driver = static
  args = uid=vmail gid=vmail home=/home/vmail/%u
}
Lalu sesu
aikan konfigurasi pada file /etc/dovecot/conf.d/auth-passwdfile.conf.ext menjadi seperti berikut
passdb {
  driver = passwd-file
  args = /etc/dovecot/imap.passwd
}
6.Konfigurasi untuk membuat user email
useradd vmail
usermod -a -G vmail vmail
vim /etc/aliases
Ubah root email menjadi berikut:
root: mail@example.com
Lalu update konfigurasi exim dan restart kedua service exim dan dovecot
update-exim4.conf
systemctl enable exim
systemctl enable dovecot
systemctl start exim
systemctl start dovecot
Create bash script untuk membuat user exim
/etc/dovecot/create_mail.sh
#!/bin/bash

# Prompt for the user's email address
read -p "Enter user's mail address: " mailaddress

# Prompt for the user's password without echoing it
read -sp "Enter password: " passwd
echo  # Output a newline for formatting

# Create the user's mail directory with appropriate permissions
sudo mkdir -p /home/vmail/"$mailaddress"
sudo chown vmail:vmail /home/vmail/"$mailaddress"
sudo chmod go-rwx /home/vmail/"$mailaddress"

# Generate the password hash using doveadm
password_hash=$(doveadm pw -s SHA256-CRYPT -p "$passwd")

# Check if the password hash was generated successfully
if [[ -z "$password_hash" ]]; then
  echo "Failed to generate password hash."
  exit 1
fi

# Append the email address and hashed password to the Dovecot password file
echo "$mailaddress:$password_hash" | sudo tee -a /etc/dovecot/imap.passwd

# Set permissions on the password file
sudo chown root:dovecot /etc/dovecot/imap.passwd
sudo chmod 640 /etc/dovecot/imap.passwd

echo "User $mailaddress has been created."
chmod +x /etc/dovecot/create_mail.sh
Lalu Anda bisa membuat user exim menggunakan command berikut:
./etc/dovecot/create_mail.sh
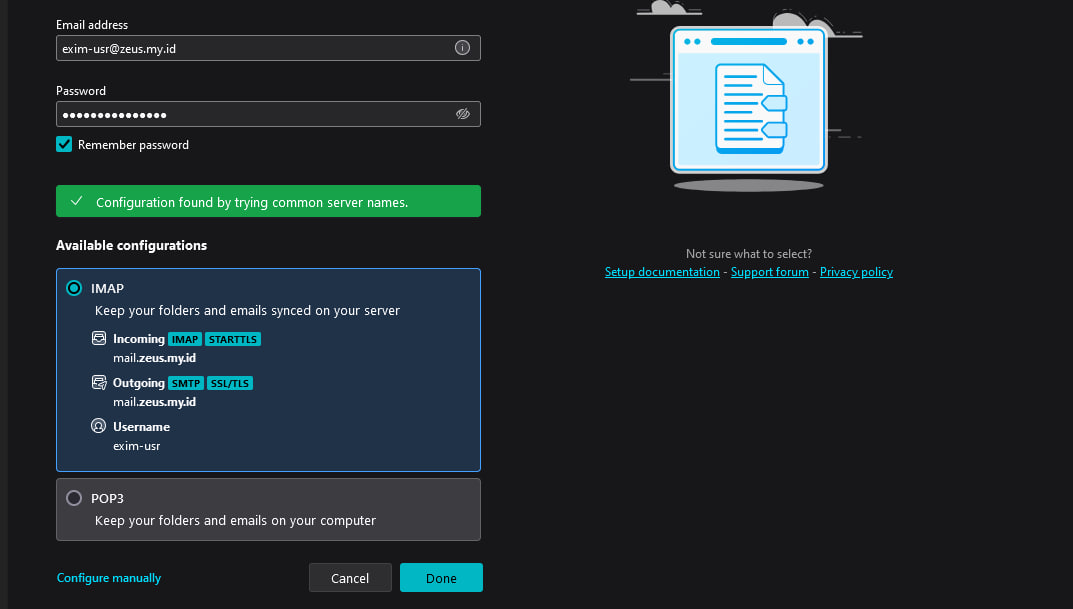
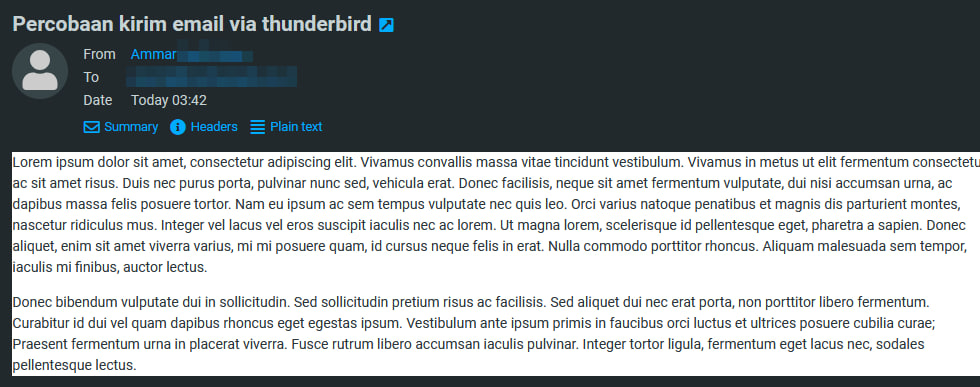
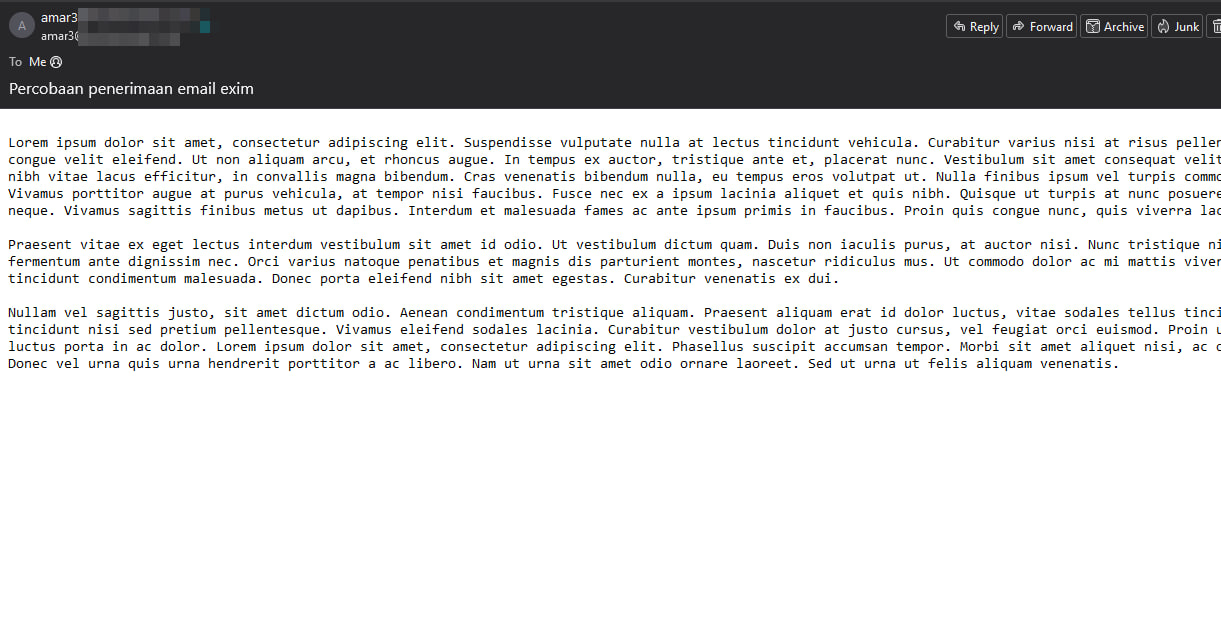
Lalu berikut hasil percobaan login,kirim dan terima email melalui thunderbird.
